
Example project
A low deck, from brief to build guide
This is what one BuildIn project looks like after the design is resolved: a low composite platform one step above grade, with the materials, cost range and construction steps to actually build it.
New accounts get 30 credits; a first design uses 10.
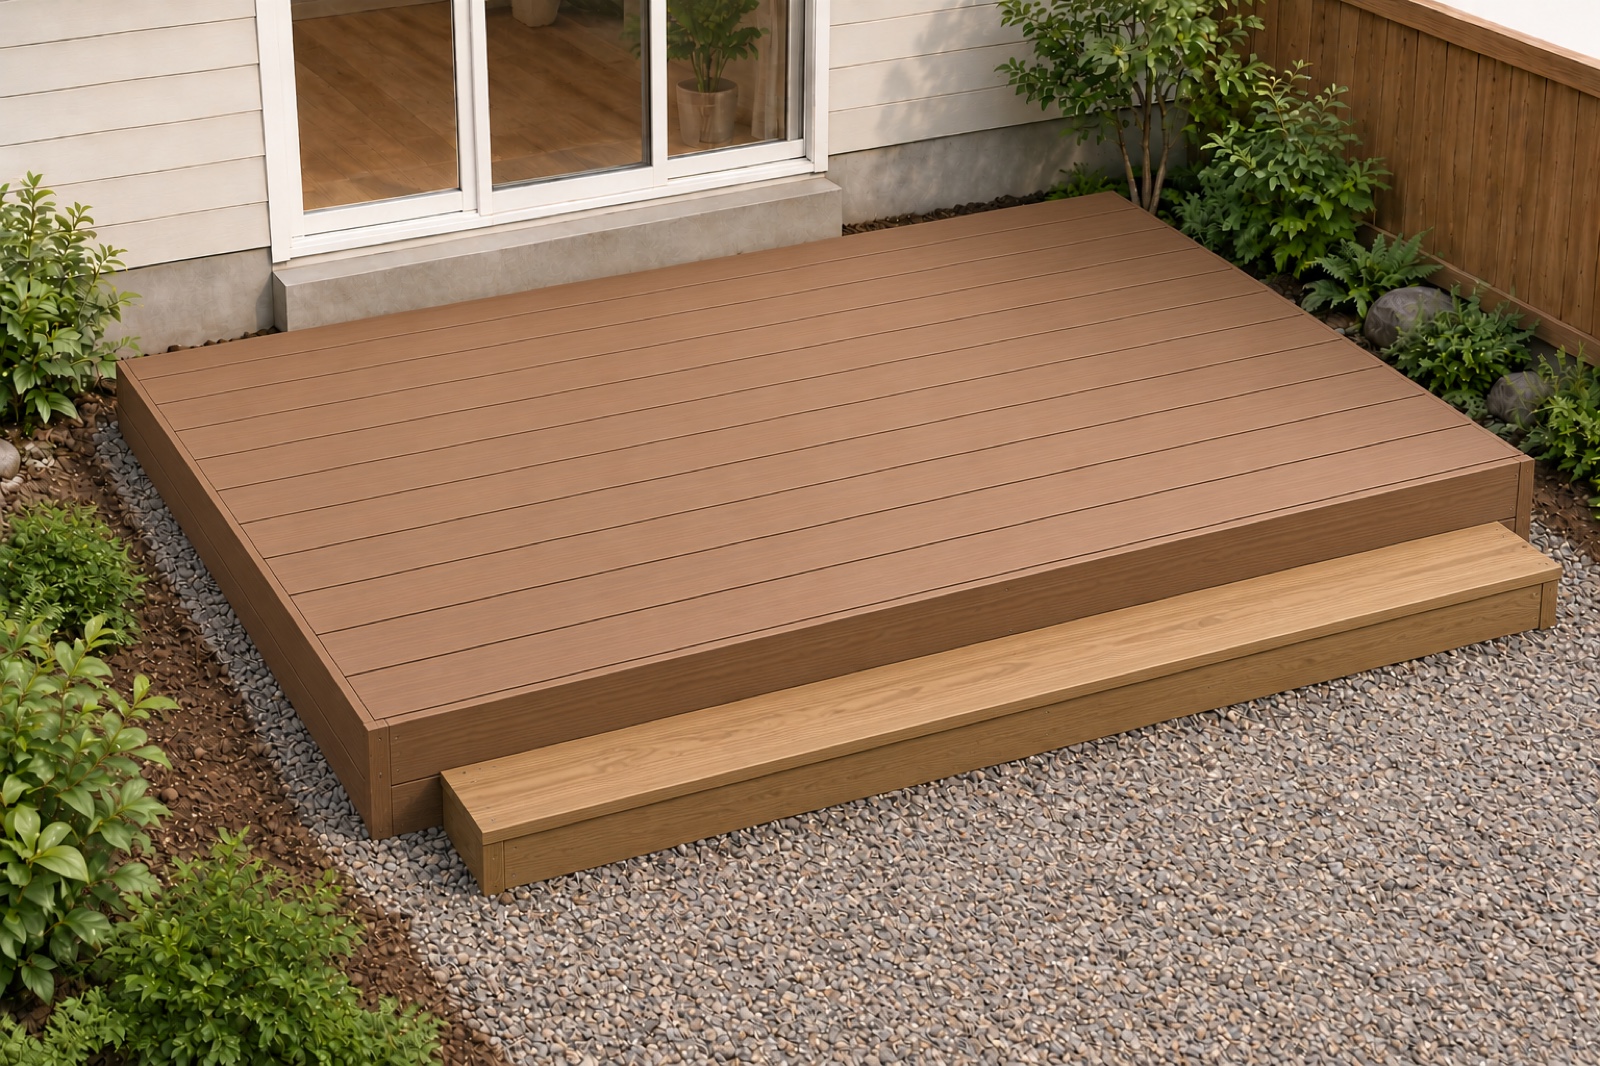
- Footprint10 × 8 ft
- HeightOne step above grade
- Build timeAbout 3 days
- Guide10 guided steps
What BuildIn produced
One brief resolves into three things you can use, not just a picture.
A design you can judge
A render, the dimensions it was built on, and an honest read on who can build it.
A priced material list
Quantities calculated from the footprint, with an illustrative US retail range.
A guide for this yard
Ten steps with tools, safety notes, acceptance checks and a diagram where the detail matters.
The brief
A low deck outside the back door, one step above grade, large enough for two chairs and a small table, with a wide step down to the gravel path.
- No railing and no tall posts
- Composite boards, warm medium brown
- Six short concrete piers in a 2 × 3 grid
- A wide, shallow step at the front edge
What the plan resolved
- 10 × 8 ft platform at 8–12 in above grade
- Two parallel double 2 × 8 beams on six piers
- Joists at 16 in on center, tops flush with the beams
- Hidden fastener clips and one shallow timber step
Materials
Example quantities for a 10 × 8 ft platform. Prices and availability vary by supplier and region — verify before buying.
The build guide
Each step carries its tools, safety notes and acceptance checks. The full guide prints for the job site.
- 01
Plan, permits and site check
Confirm the footprint, check local permit rules and call 811 before any digging.
- 02
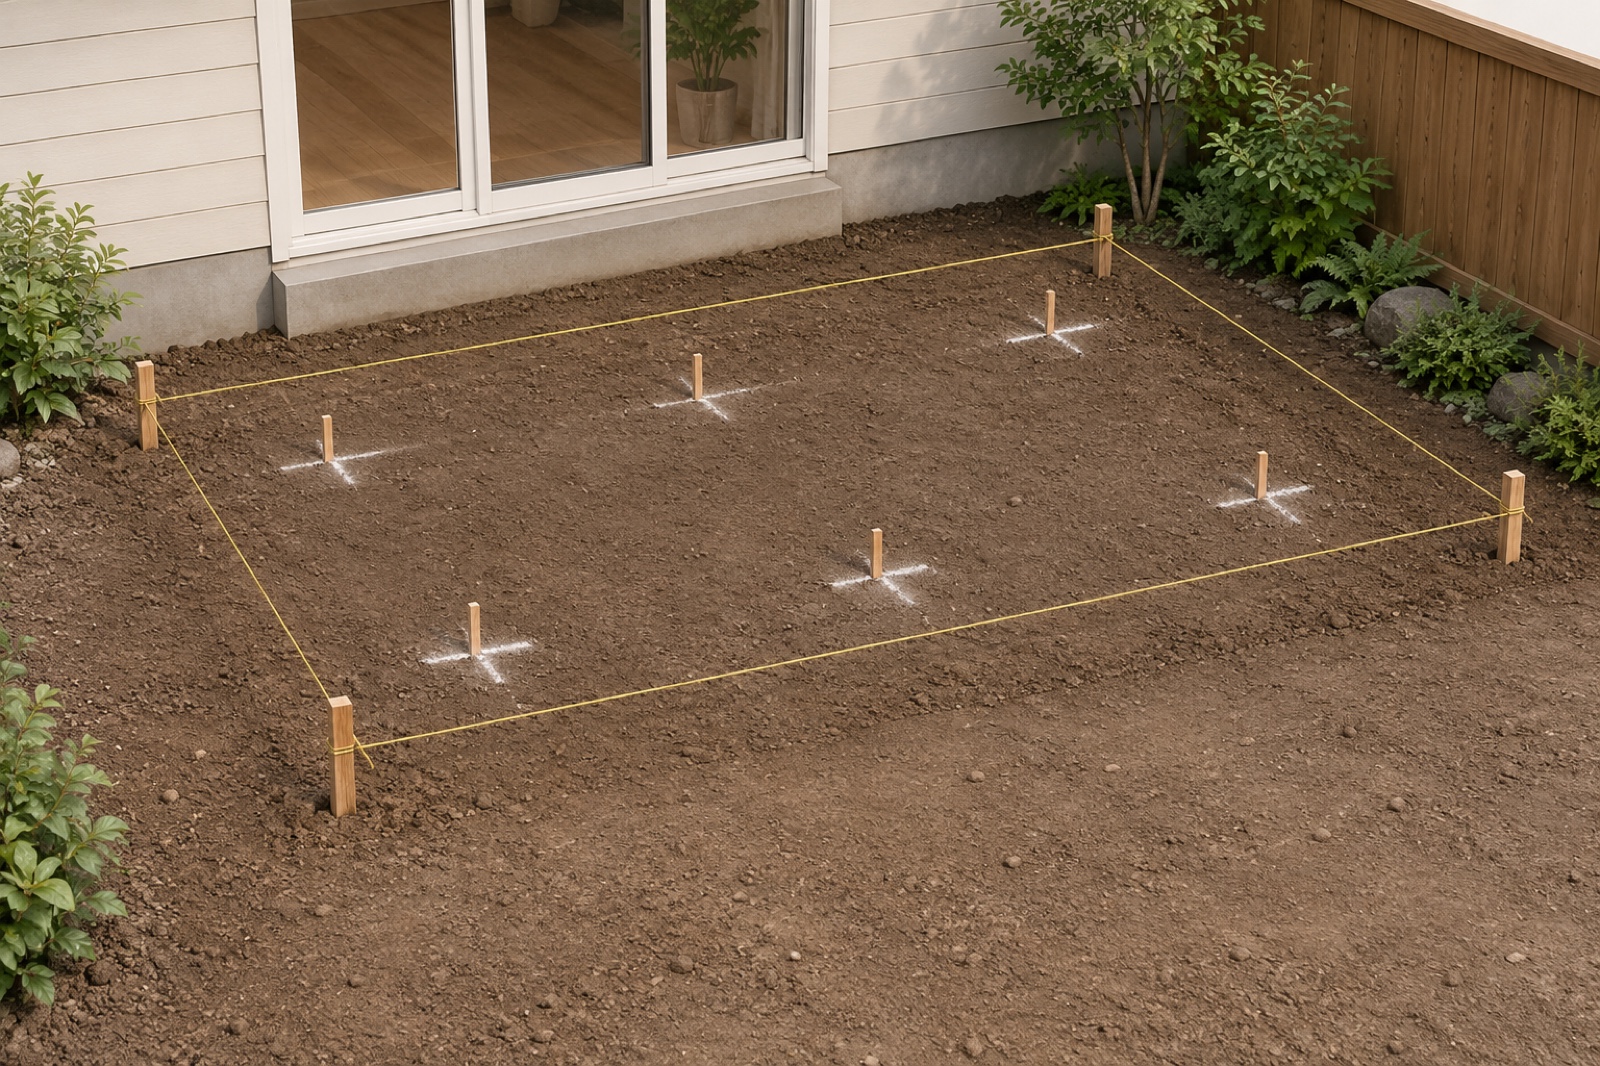
Set out and establish height
Mark a level 10 × 8 ft rectangle; the string lines hold the finished height one step above grade.
- 03
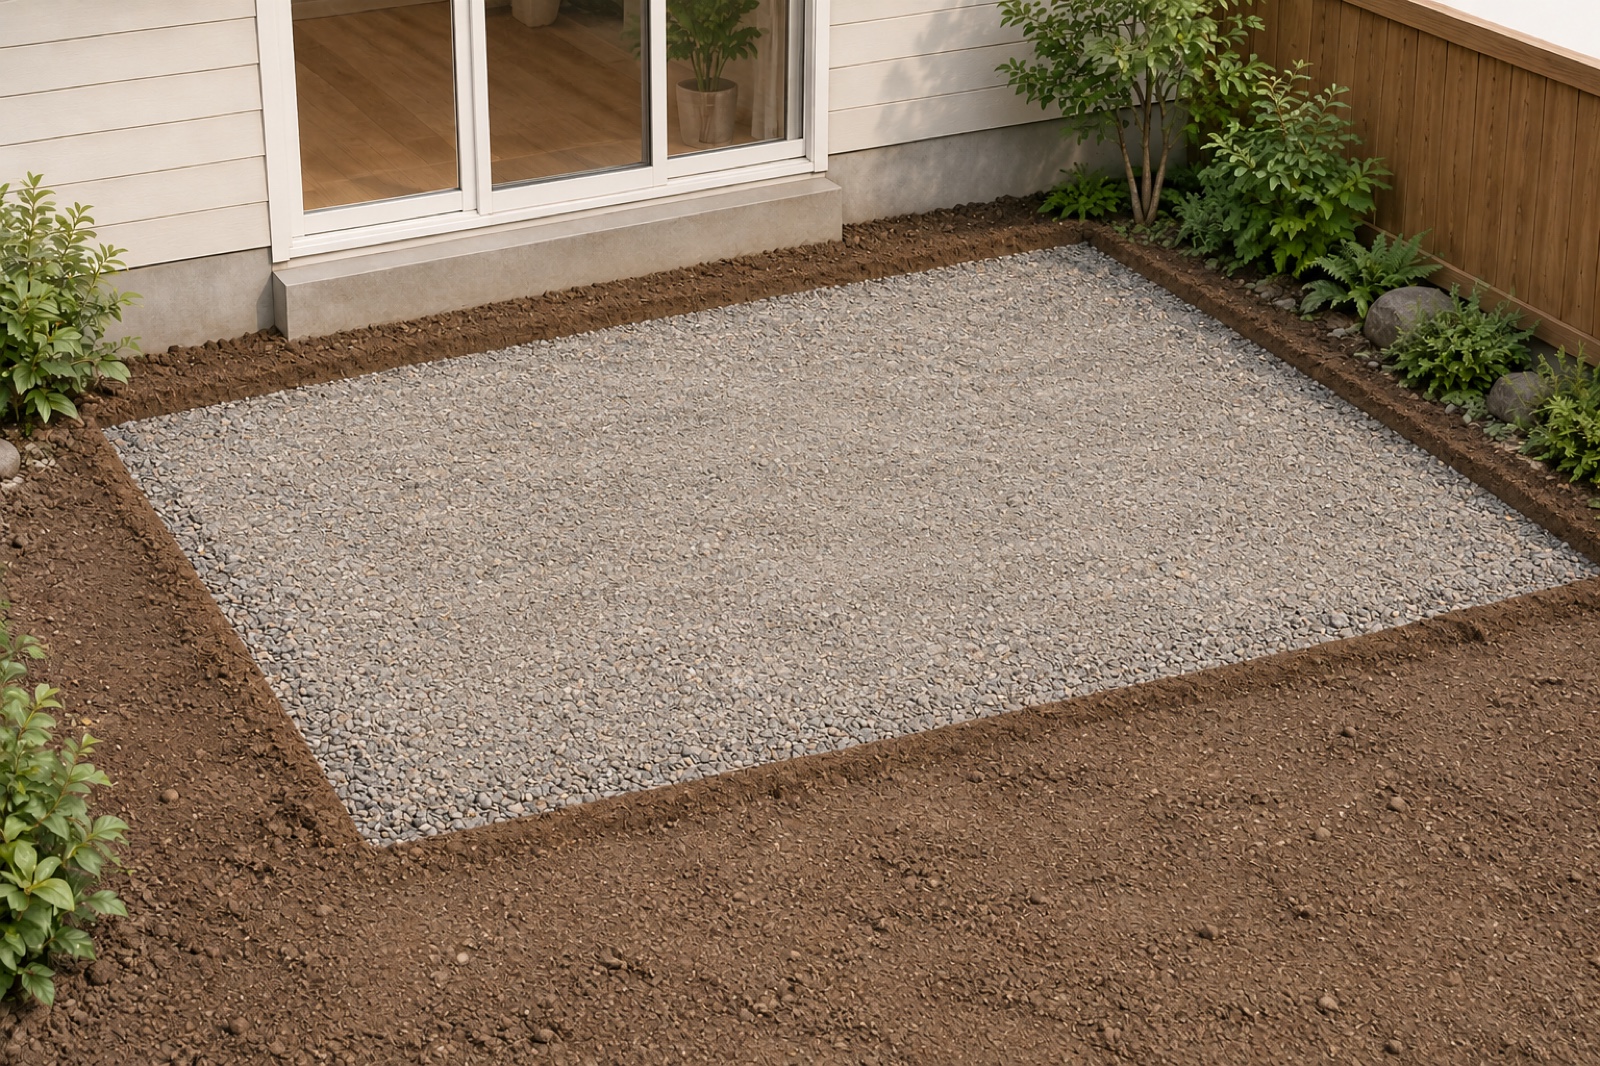
Strip, grade and compact the base
Remove sod, rake a slight fall away from the house and compact the subgrade.
- 04
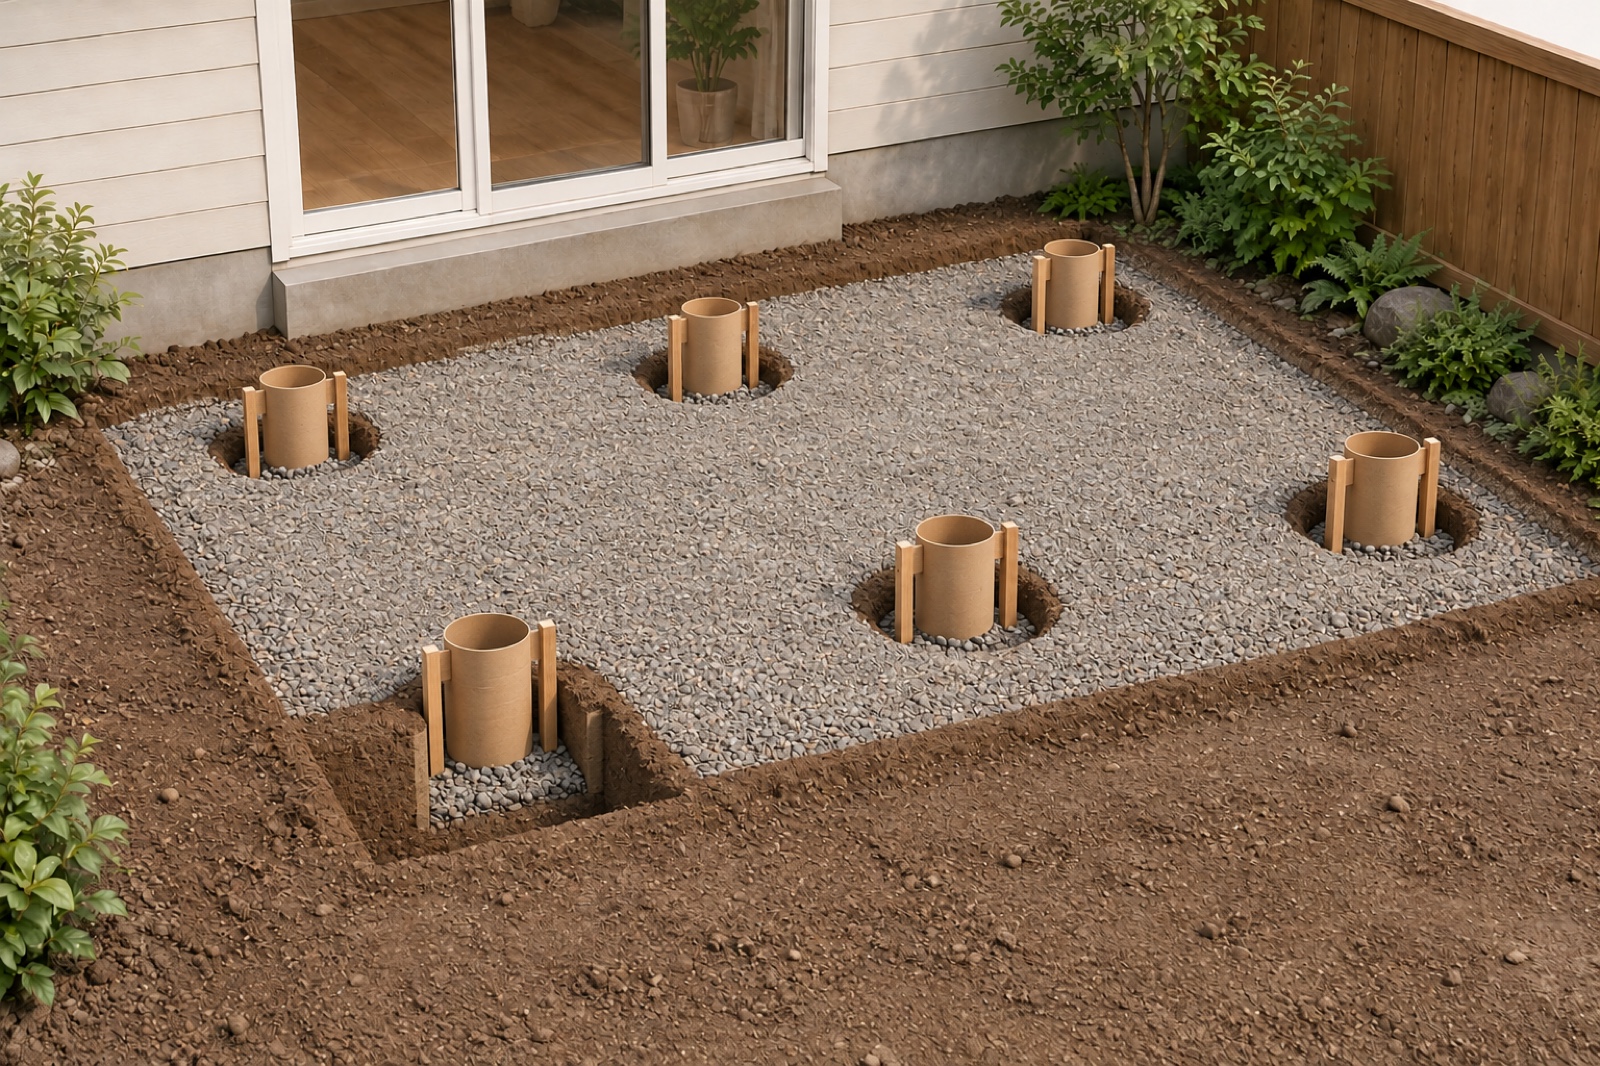
Dig and form the pier holes
Six holes in a strict 2 × 3 grid, each with gravel at the bottom and a form tube standing plumb.
- 05
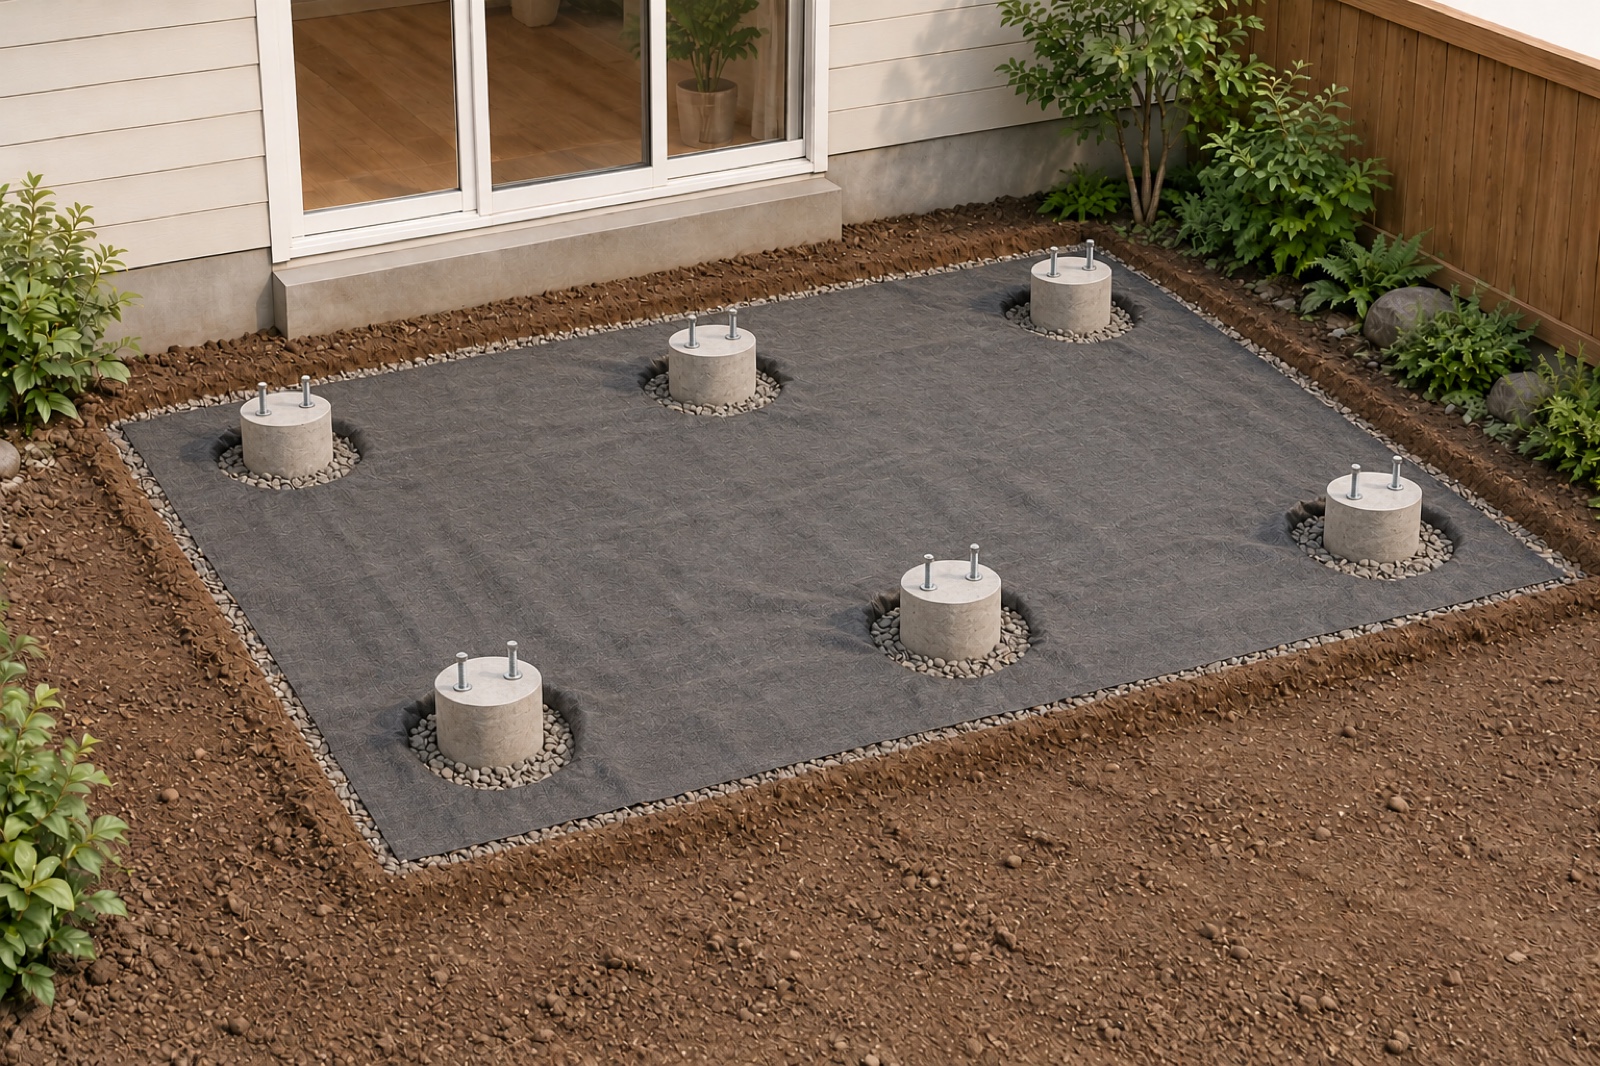
Pour the piers and set the anchors
Fill each tube with concrete and set two anchor bolts aligned with the beam direction.
- 06
Set the beams
Bolt a galvanized beam saddle to each pier, then set two parallel double 2 × 8 beams with their tops flush.
- 07
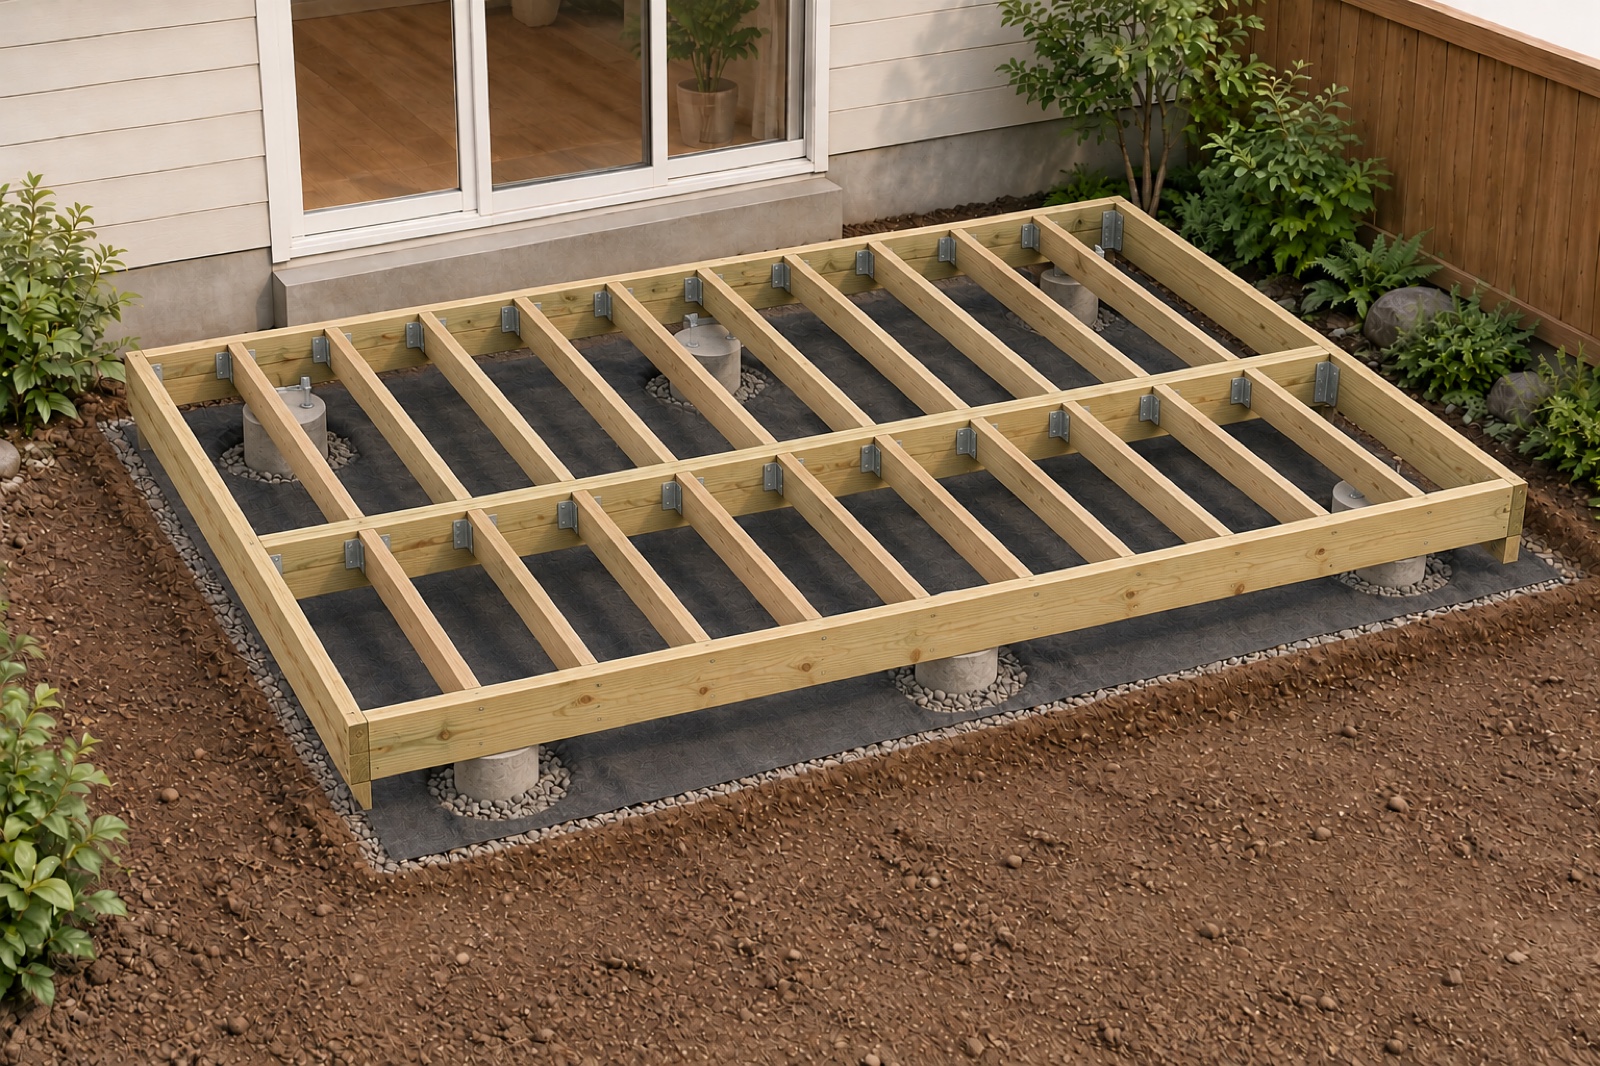
Frame joists and perimeter
Hang joists from the beams, add rim joists and blocking, and keep every top flush.
- 08
Lay the decking
Start straight, keep the manufacturer’s gap, and fasten every joist crossing with a hidden clip and two stainless screws.
- 09
Fascia, edge and step
Wrap the exposed edge with fascia and add one wide, shallow step bearing on compacted gravel.
- 10
Final inspection and clean-up
Check every fastener, sweep the surface and schedule the final inspection if your permit requires one.
This is one example. Your yard starts with a photo and a brief.
Tell BuildIn what you want, check the read before you spend anything, then generate a design and build guide for your own space.
New accounts get 30 credits; a first design uses 10.